What still blocks scale is continuity. Story logic across scenes, character and environment consistency, and control over a complex production workflow. That is exactly what Zopia AI is built for.
Zopia is not just a video generator. It is an end-to-end AI production system covering scriptwriting, storyboarding, video generation, and timeline editing, designed for creators and professional teams that need stable, repeatable output. This guide follows a real-world workflow: starting from a natural-language idea and ending with a publish-ready short drama or video.
Step 1. How Zopia Works: A Full Pipeline, Started by Conversation
In most AI video stacks, creators bounce between disconnected tools: script apps, image generators, video models, and editing software. The result is a fragmented workflow with high operational overhead and inconsistent outputs. Zopia streamlines the entire creation process into one seamless, end-to-end pipeline:
Script generation → Character/scene asset building → Storyboard generation → Video
rendering → Timeline assembly → Final export
The interface is conversational. Zopia helps break down steps, confirms key checkpoints, and lets you intervene at any stage.
Step 2. Start a Project with Natural Language
Go to zopia.ai (https://zopia.ai), log in, and choose Project ➡️ New Base or Enter your Idea directly from the Input box.
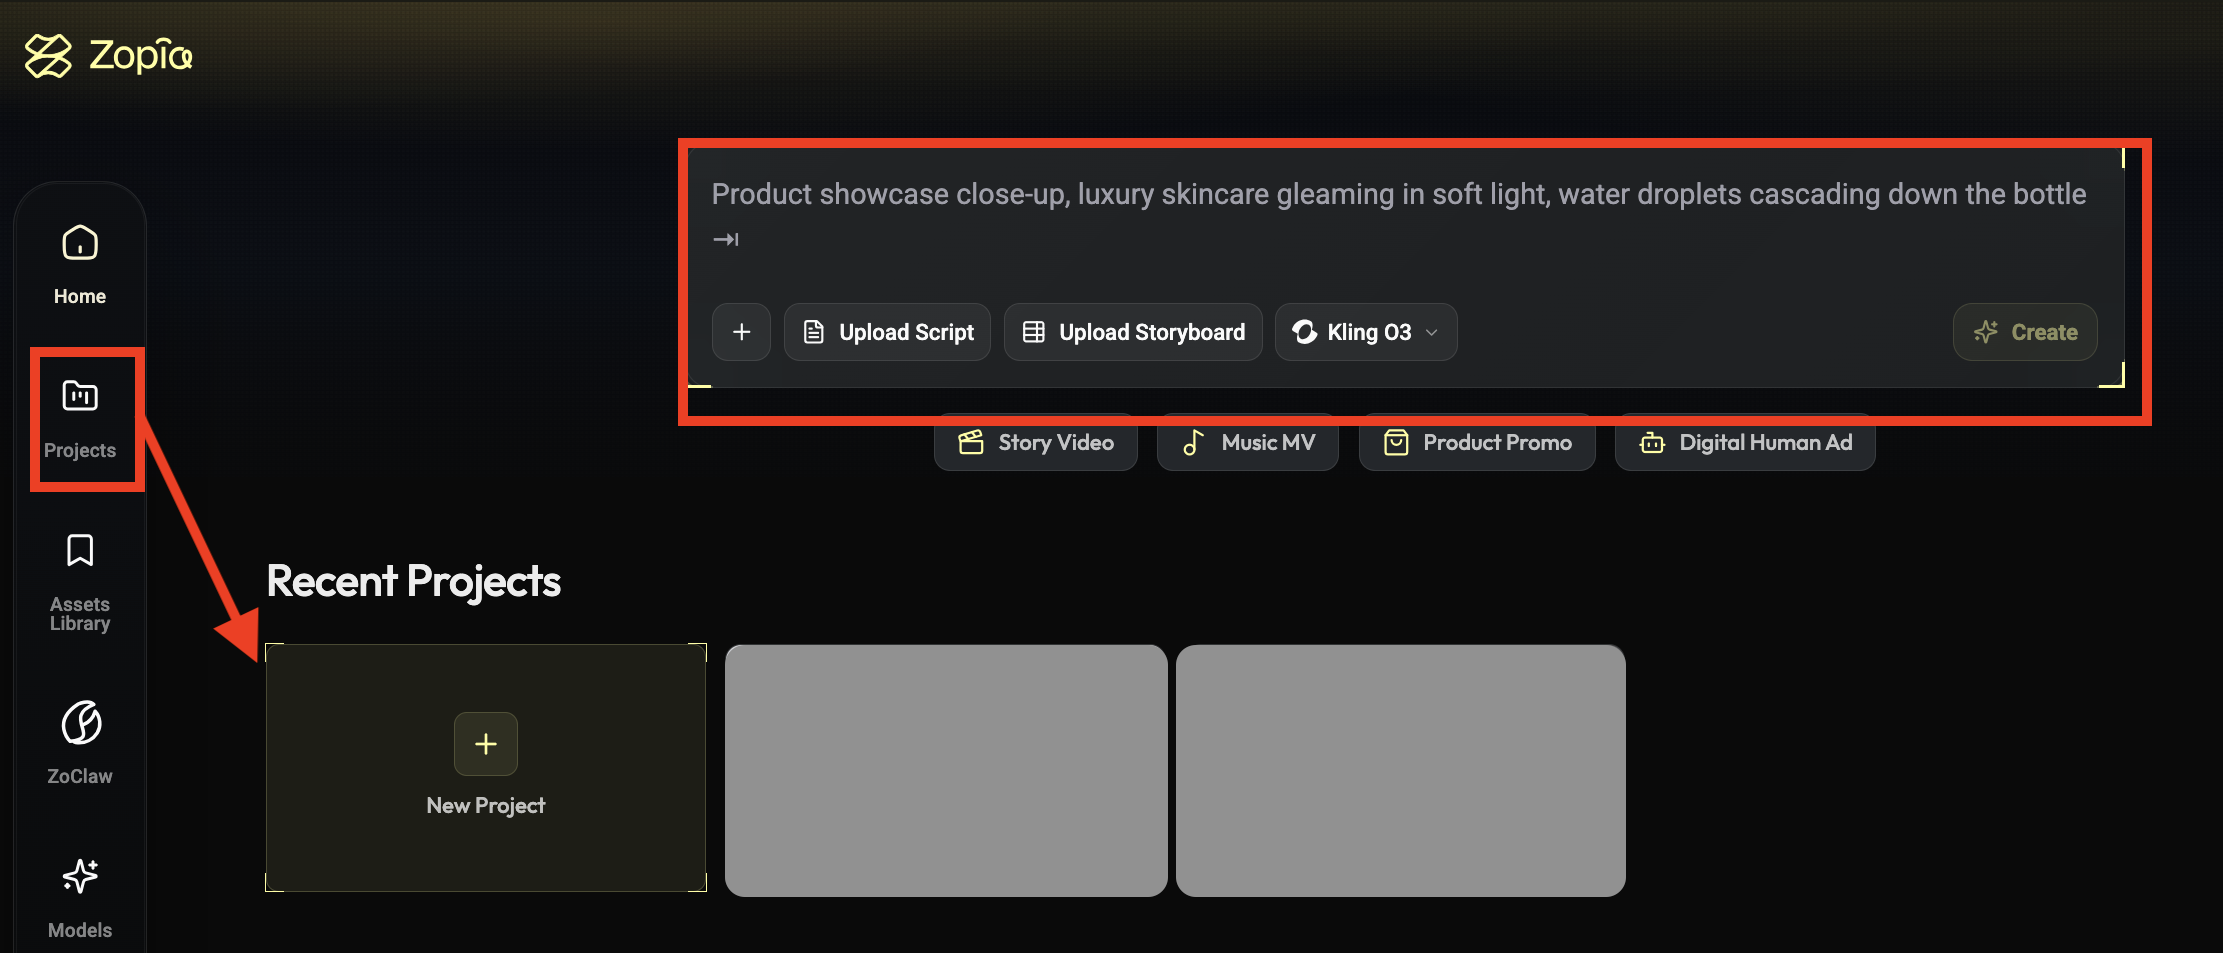
2.1 Enter Your Idea (Prompt)
Describe your concept in plain language. For example:
Content type: short drama, ad, motion comic
Visual style: realistic, anime, 3D
Emotional rhythm: high-energy, suspenseful, warm
A hands-On Case:
Let’s create a cyberpunk suspense story. We can start by giving the AI a few creative keywords and core directions.
Genre: Cyberpunk Suspense / Short Drama
Target Audience: Sci-fi Fans / Thriller & Suspense Viewers
One-Line Premise: A female hacker flees through a rainy neon city, only to discover the person chasing her is her former partner.
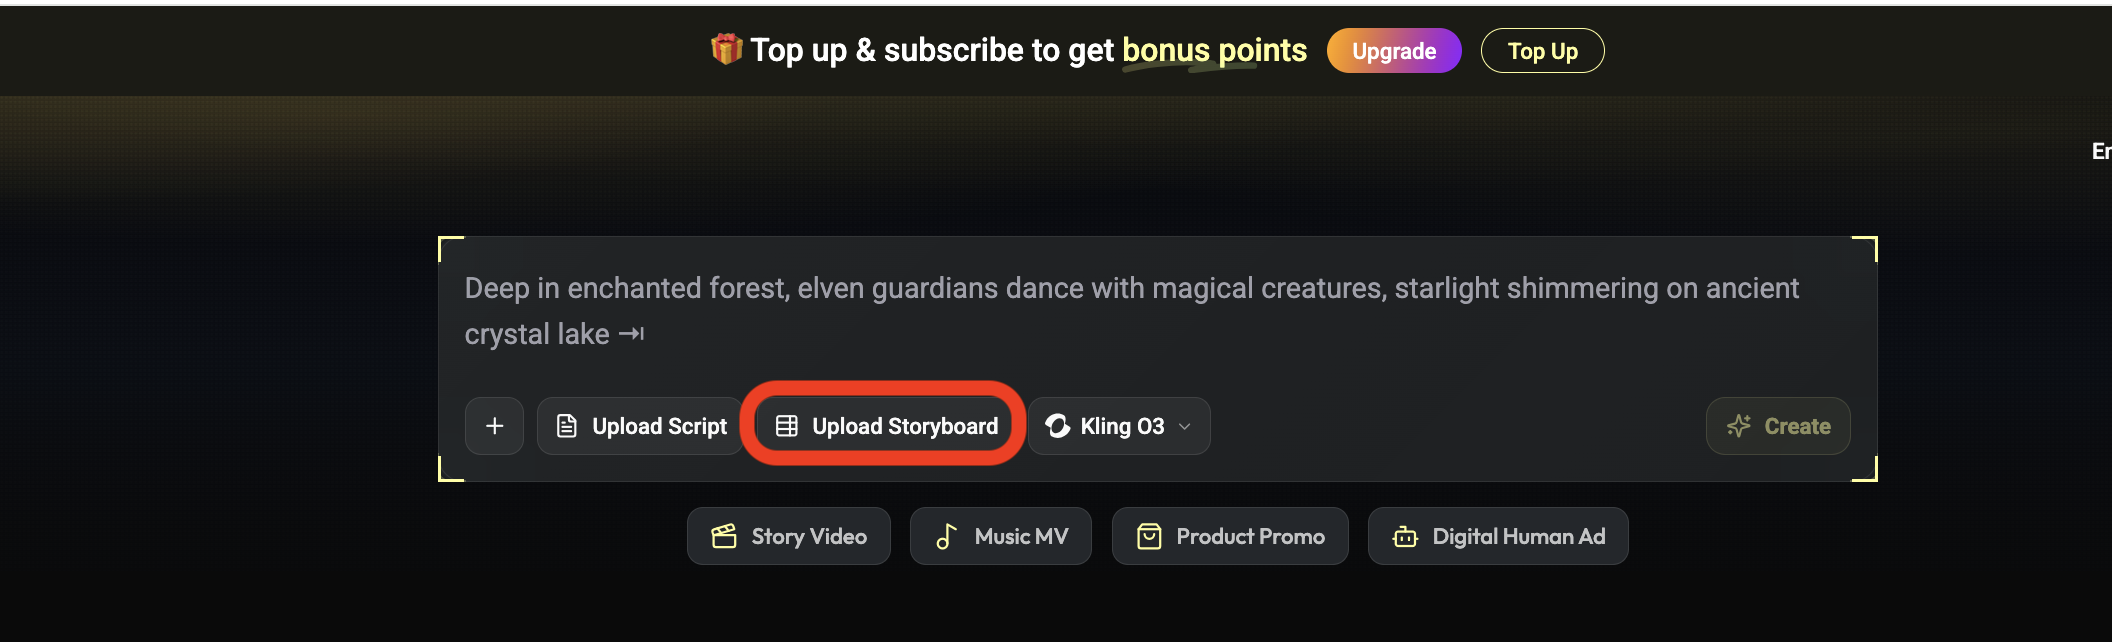
You do not need complex prompt engineering. You can also upload your own script and click Create to send it into Zopia’s full production flow.
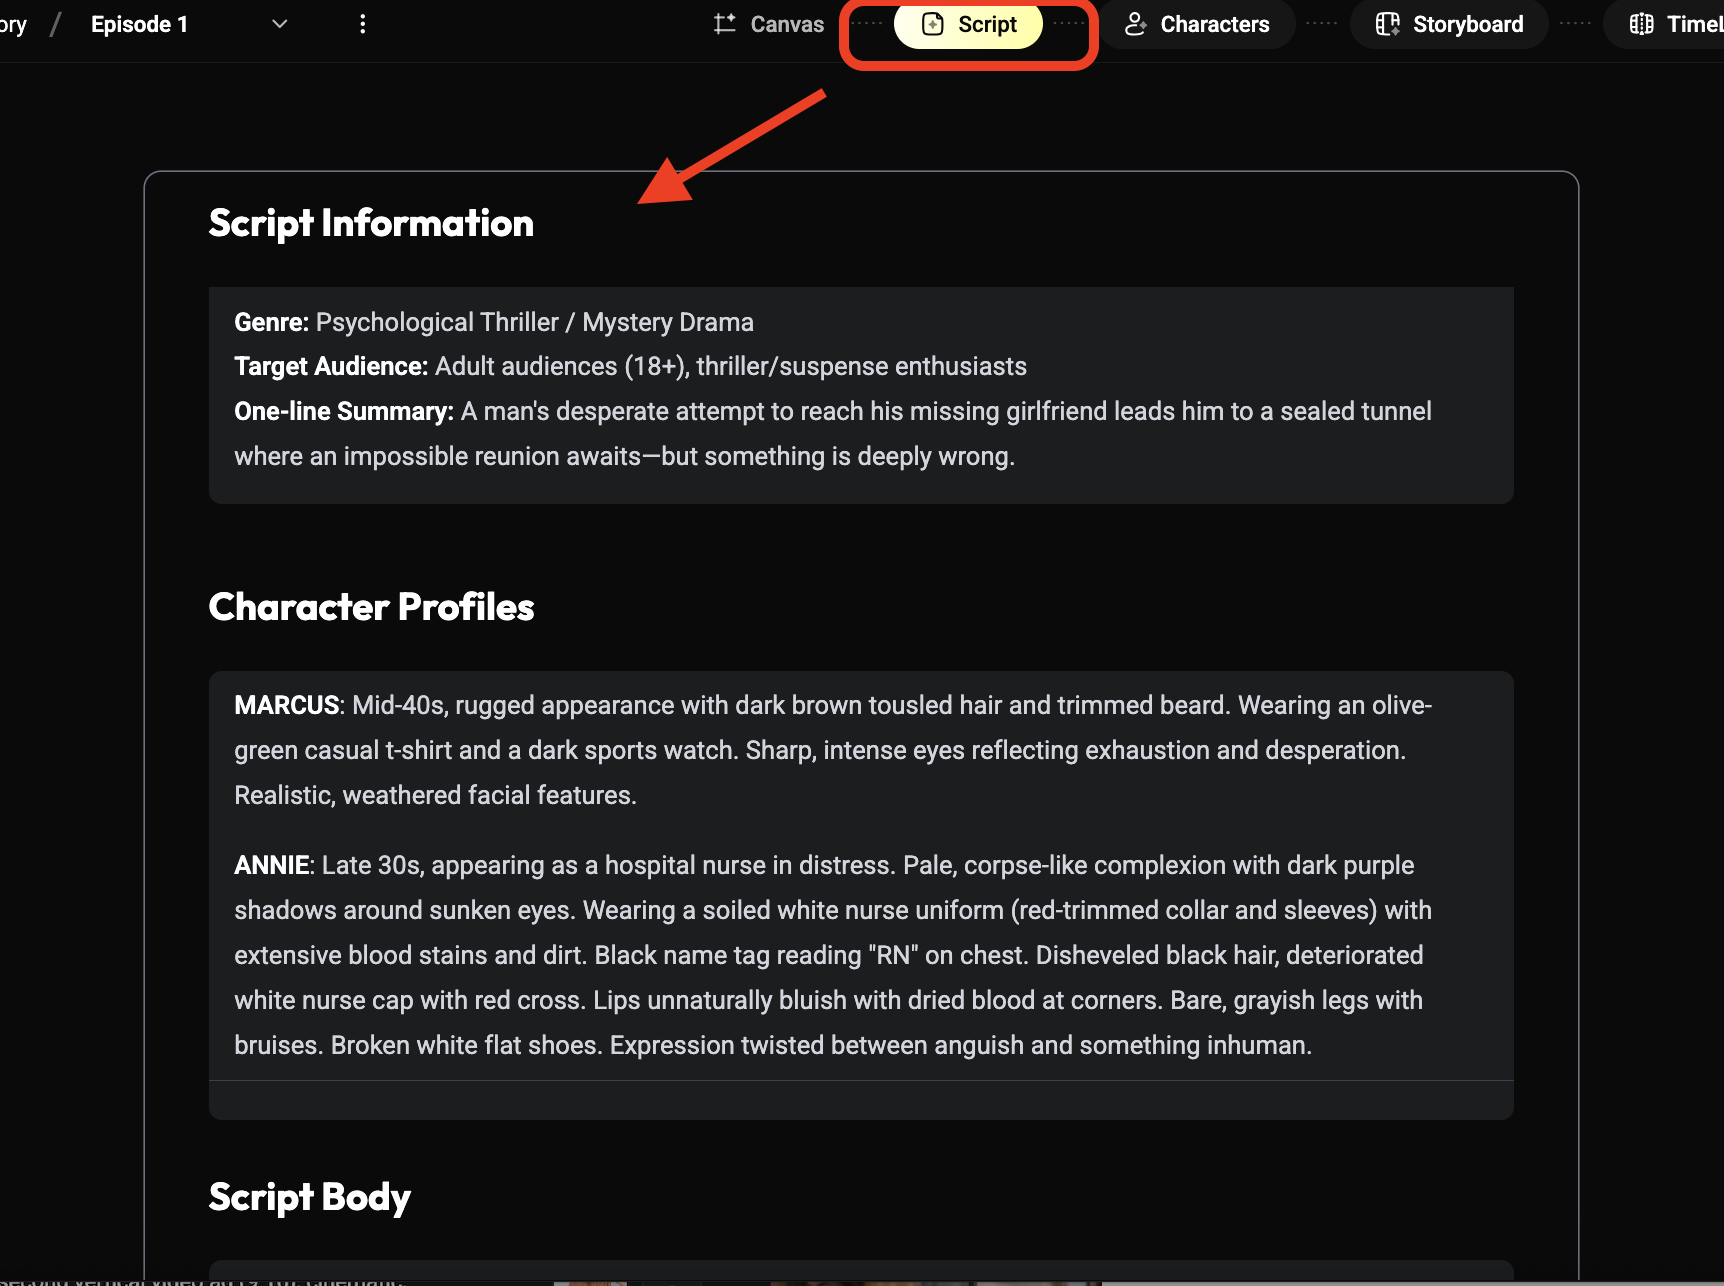
2.2 Review and Edit the Script
After the script agent generates a draft, you can:
Review full text in the Script panel
Directly edit plot points, relationships, and pacing
Ask for revisions in chat (for example: “compressing the rhythm”)
The script remains editable throughout the project.
Step 3. Core Setup: Format, Model, and Workflow
➡️Before visual generation, set the basics.
3.1 Aspect Ratio and Resolution
Aspect ratio: 16:9 (YouTube, web) or 9:16 (TikTok, Reels, Shorts)
Image size: up to 4K
Video output: up to 4k
3.2 Choose a Video Model
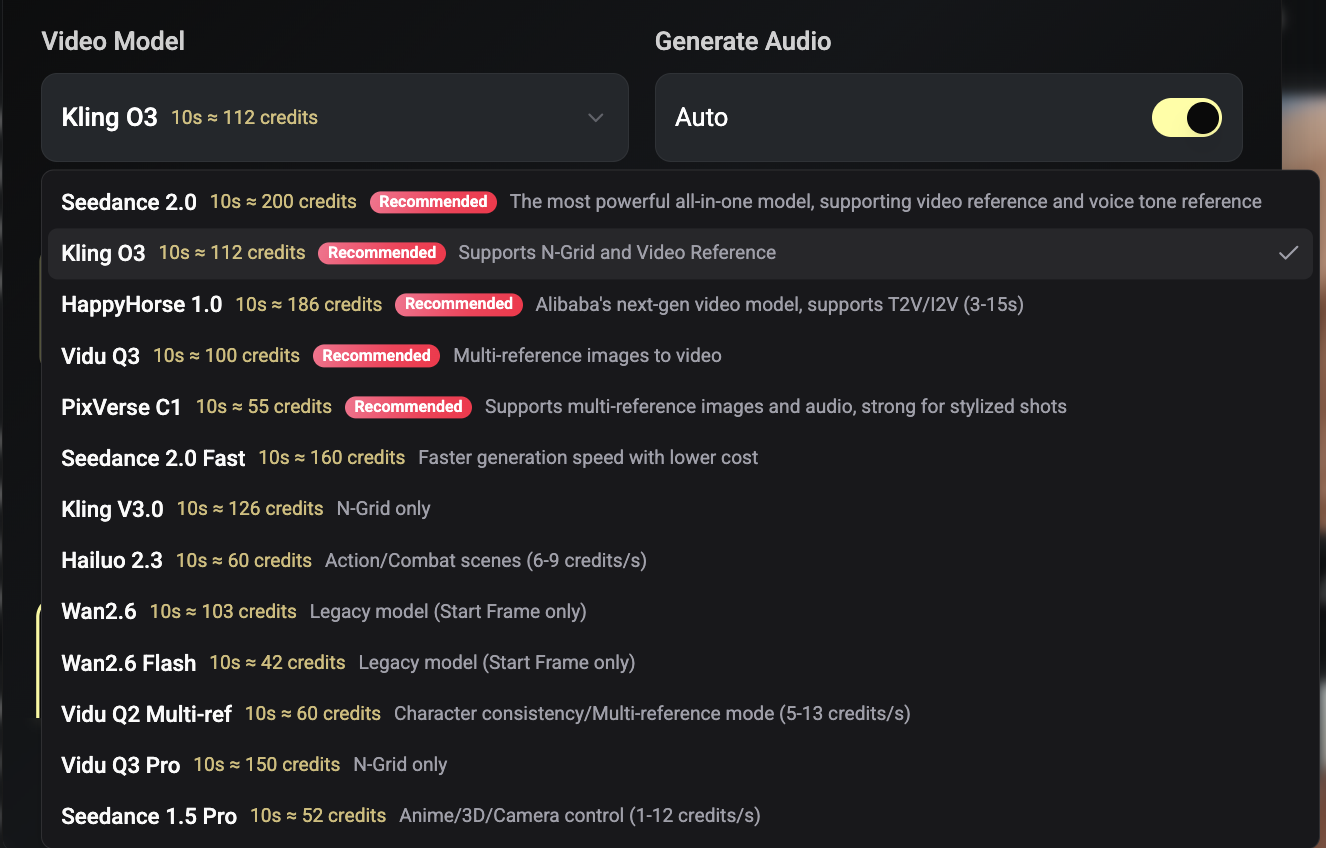
Zopia supports multiple models, including:
Seedance 2.0 (member only feature): strong for live-action shorts, motion, and facial- expression stability
Kling / Vidu: useful for stylized or animated outputs
You can switch models later without rebuilding the entire project.
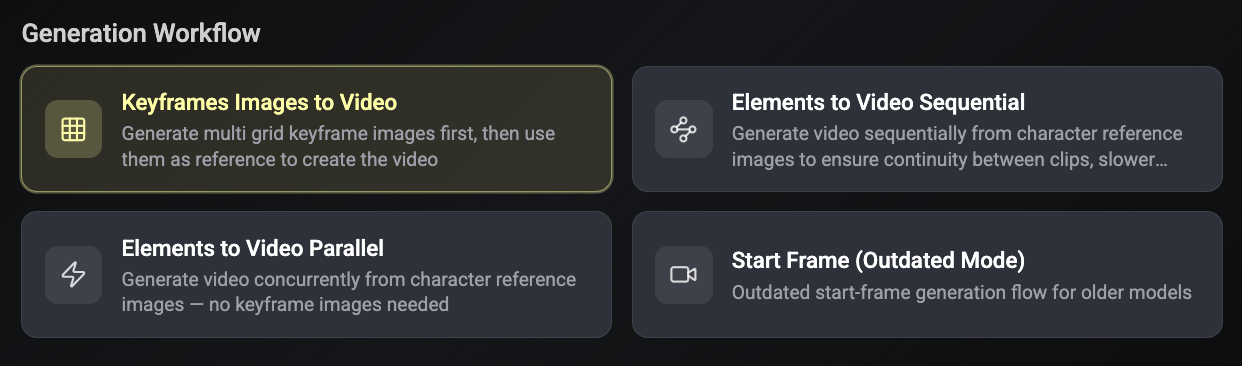
3.3 Pick a Workflow Mode


Keyframes Images to Video: fastest, lower credit use
Elements to Video Sequential: highest controllability for complex narratives
Elements to Video Parallel: best consistency for fight scenes and continuous action
For first-time users, Keyframes Images to Video is usually the easiest way to understand shot structure.
Step 4. Character and Scene Assets: Build Reusable Visual Foundations
After script confirmation, Zopia auto-generates characters, scenes, and key props.
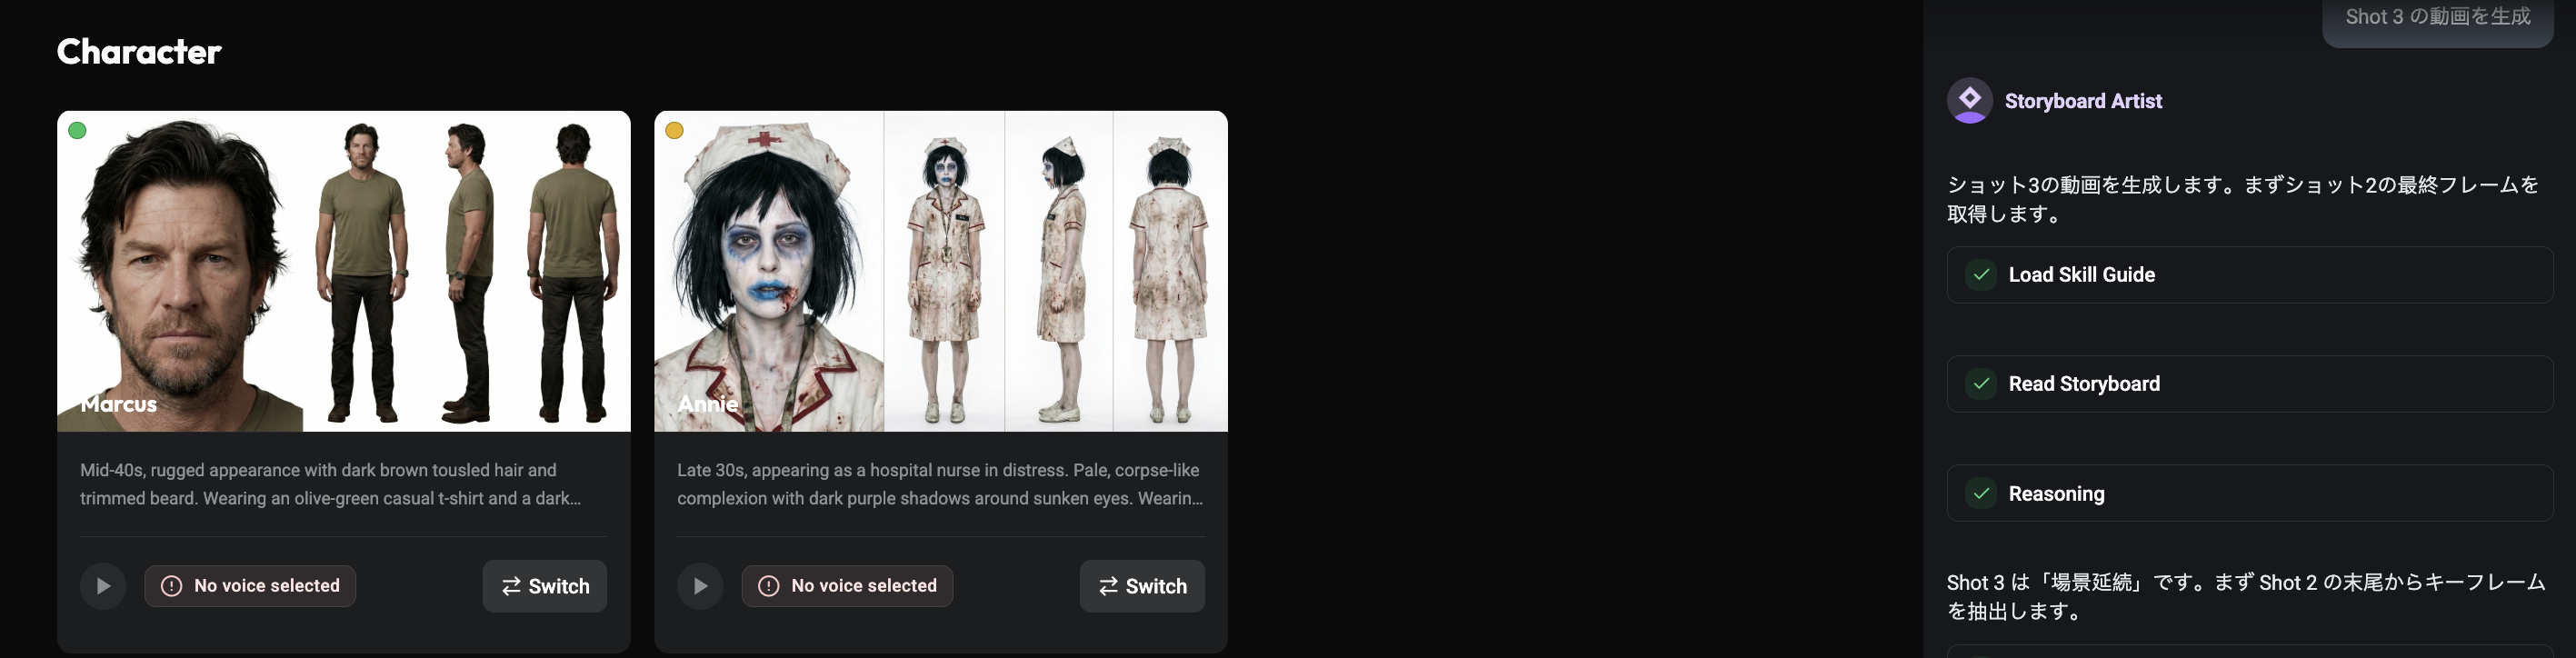
4.1 Character Setup
Auto-detects characters from script and generates visual identities
Supports edits to wardrobe, hairstyle, and personality cues
Allows local reference image upload for tighter control
Character assets are locked and reused across scenes/episodes for consistency.
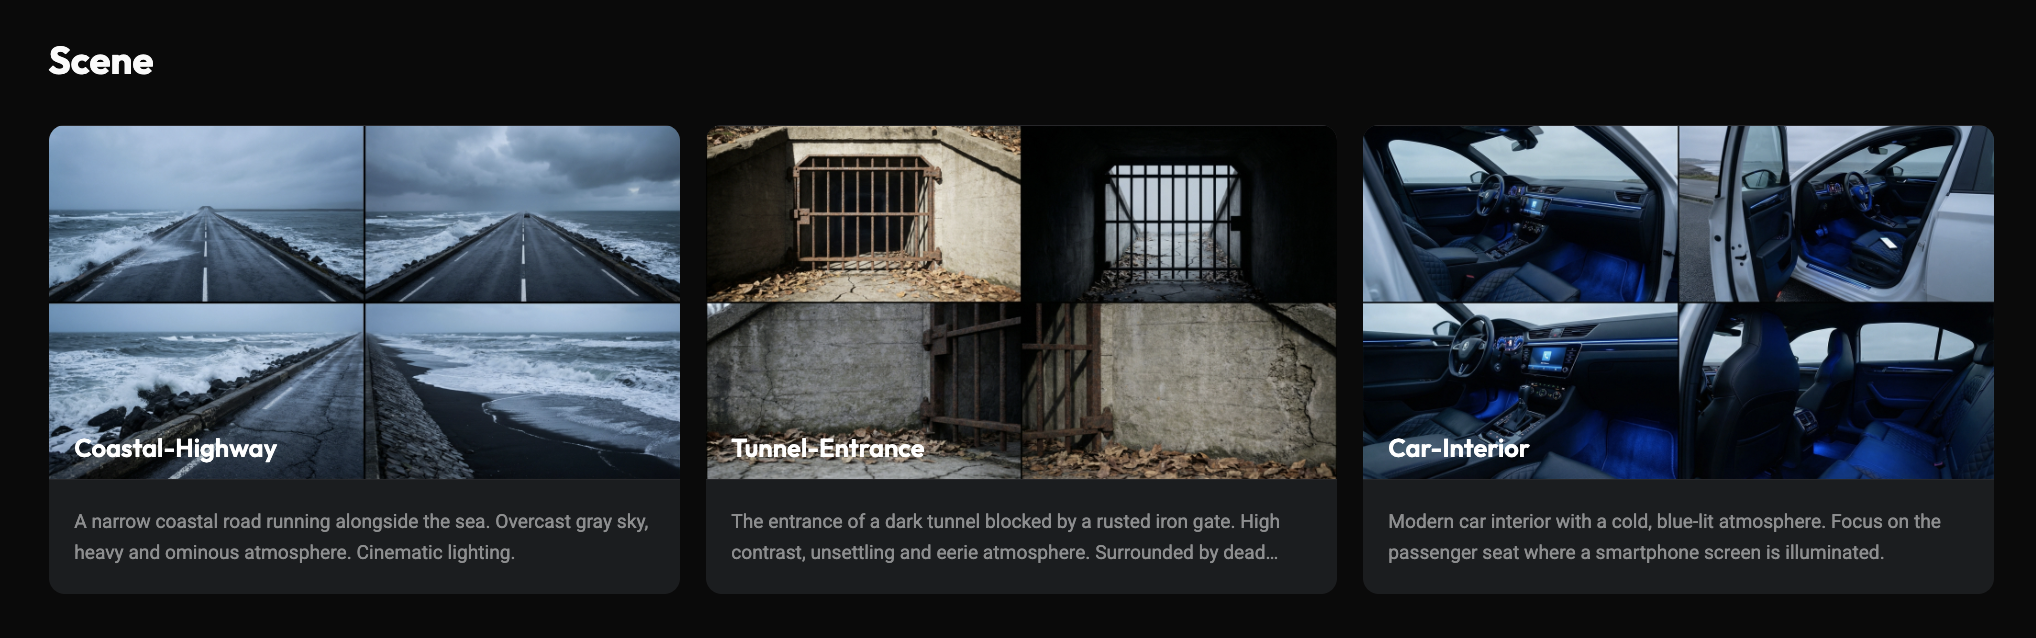
4.2 Scene and Multi-View Generation
Generates main view plus side/back views
Multi-view assets improve spatial logic and shot continuity
Everything is centralized on the canvas for asset management
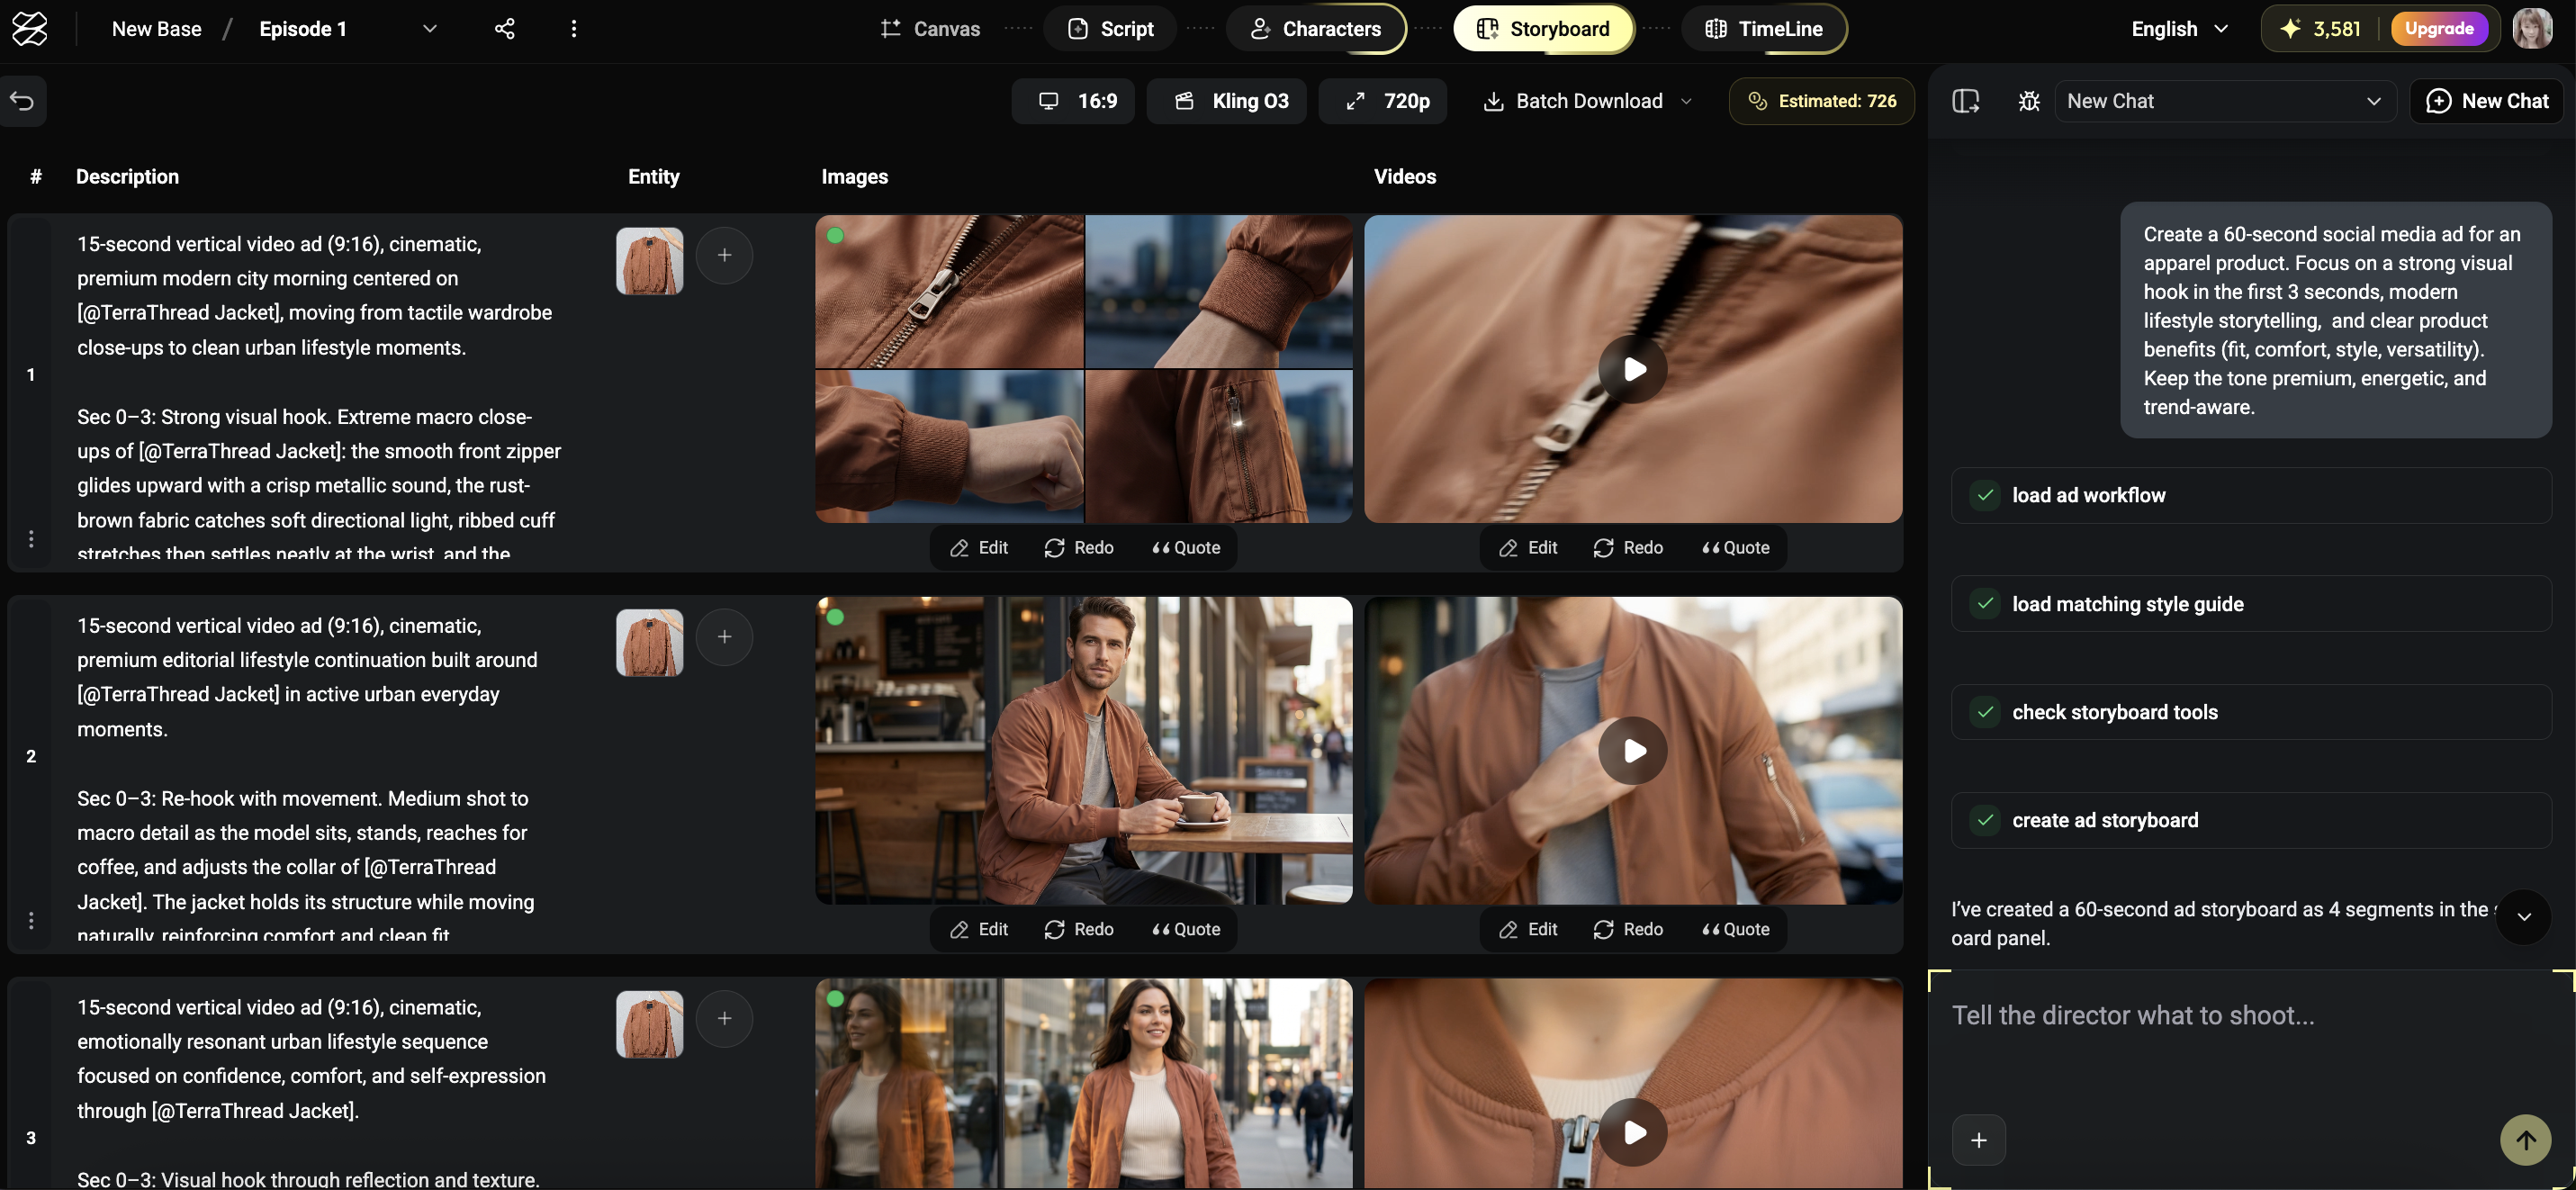
Step 5. Storyboarding: From Static Structure to Motion
5.1 Generate Storyboards
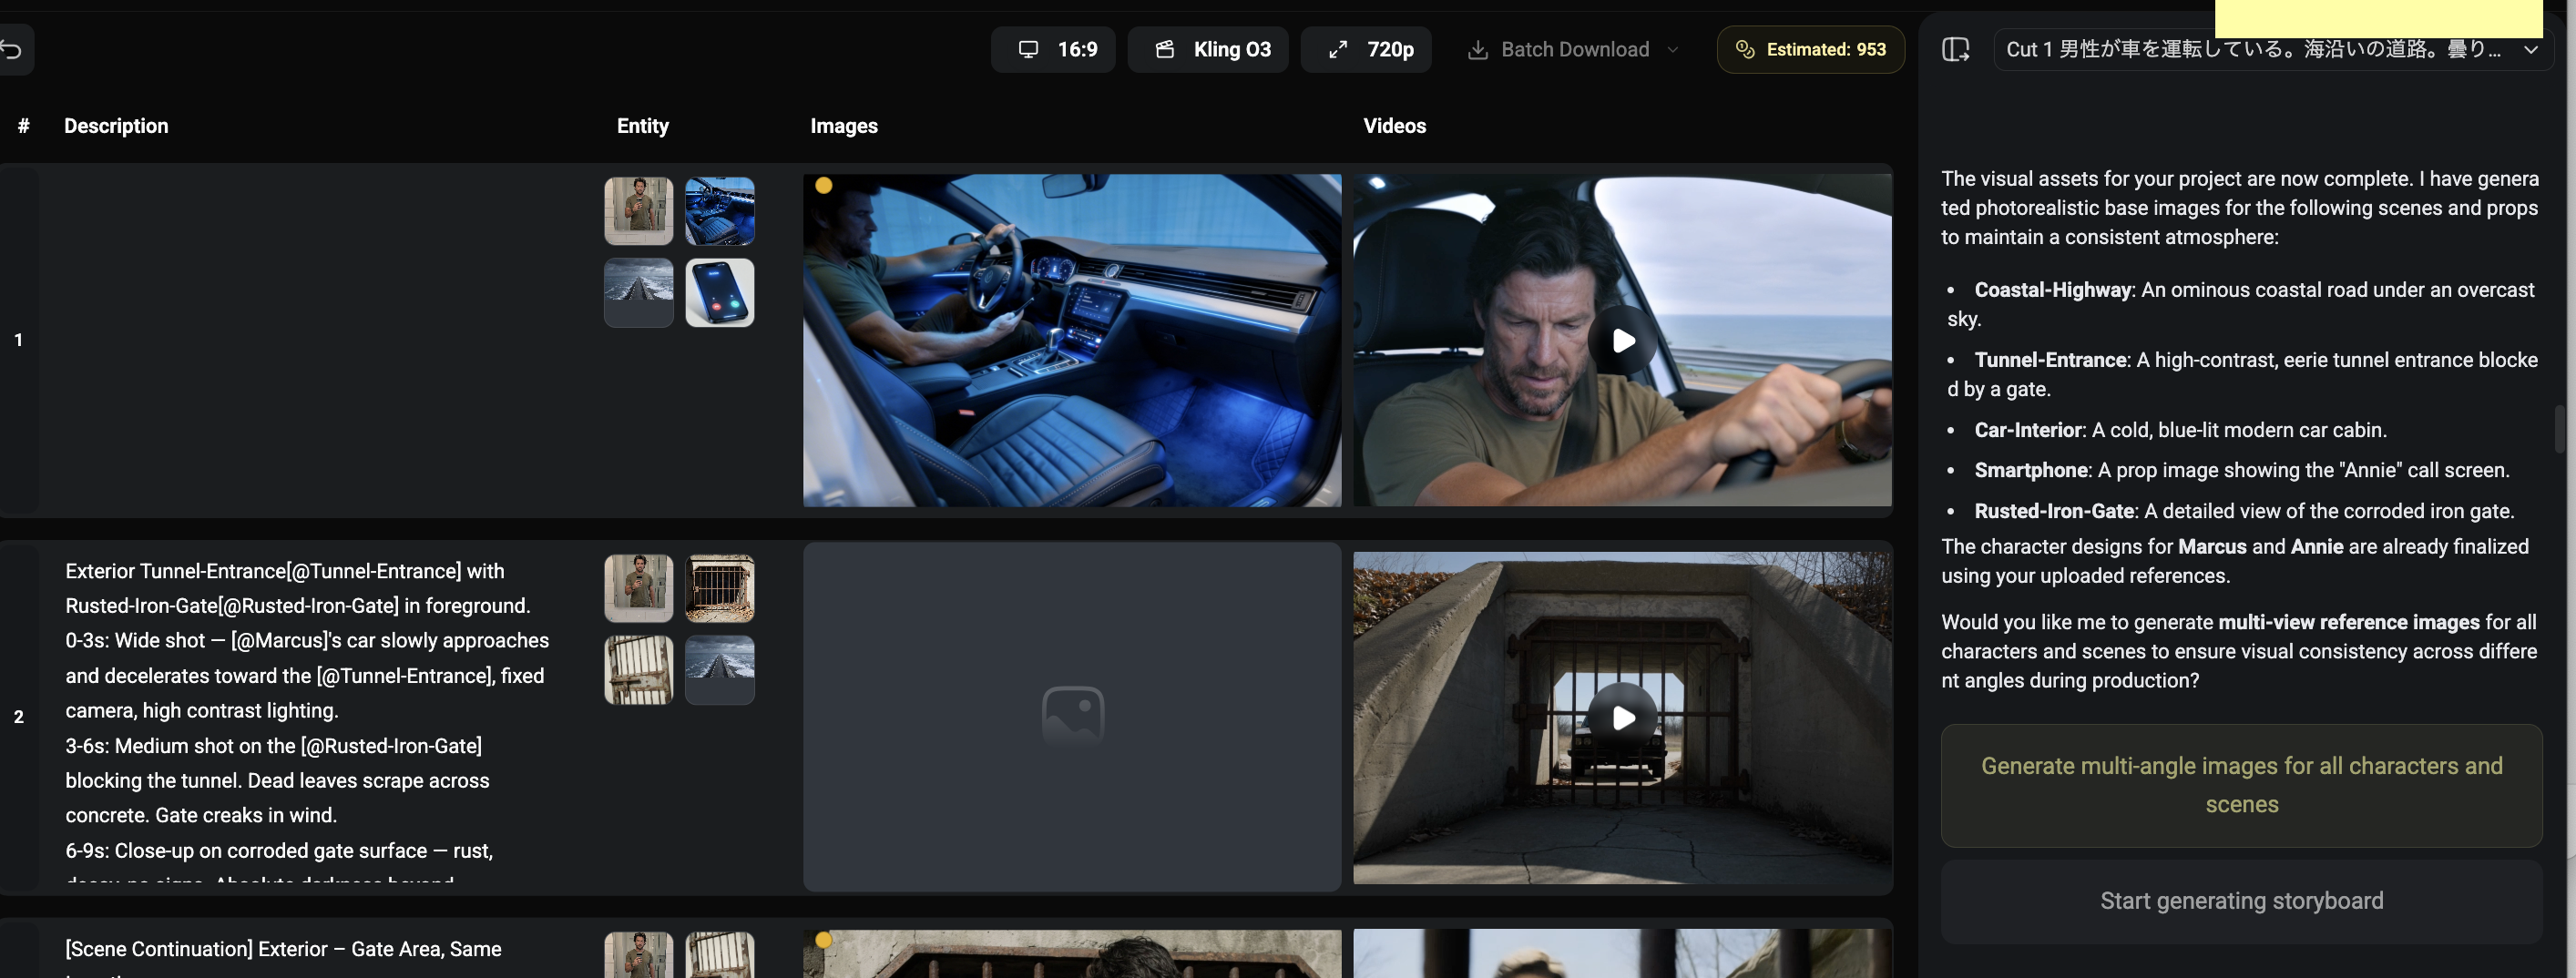
In storyboard-grid mode:
1. Generate a multi-panel storyboard
2. Review and fine-tune each panel
3. Convert to video shots in one click
This catches narrative issues before render, reducing expensive rework.
5.2 Edit Shot-by-Shot
Per shot, you can:
Change prompt/model/reference image
Insert new shots
Drag-and-drop between canvas assets and storyboard cells
Step 6. Audio-Video Generation and Timeline Assembly
6.1 Audio + Video Generation

With supported models (including Seedance 2.0), Zopia can:
Generate dialogue and ambient sound
Sync lip movement with timing
Keep a fixed character voice or use uploaded audio
You also can disable audio generation to save credits.
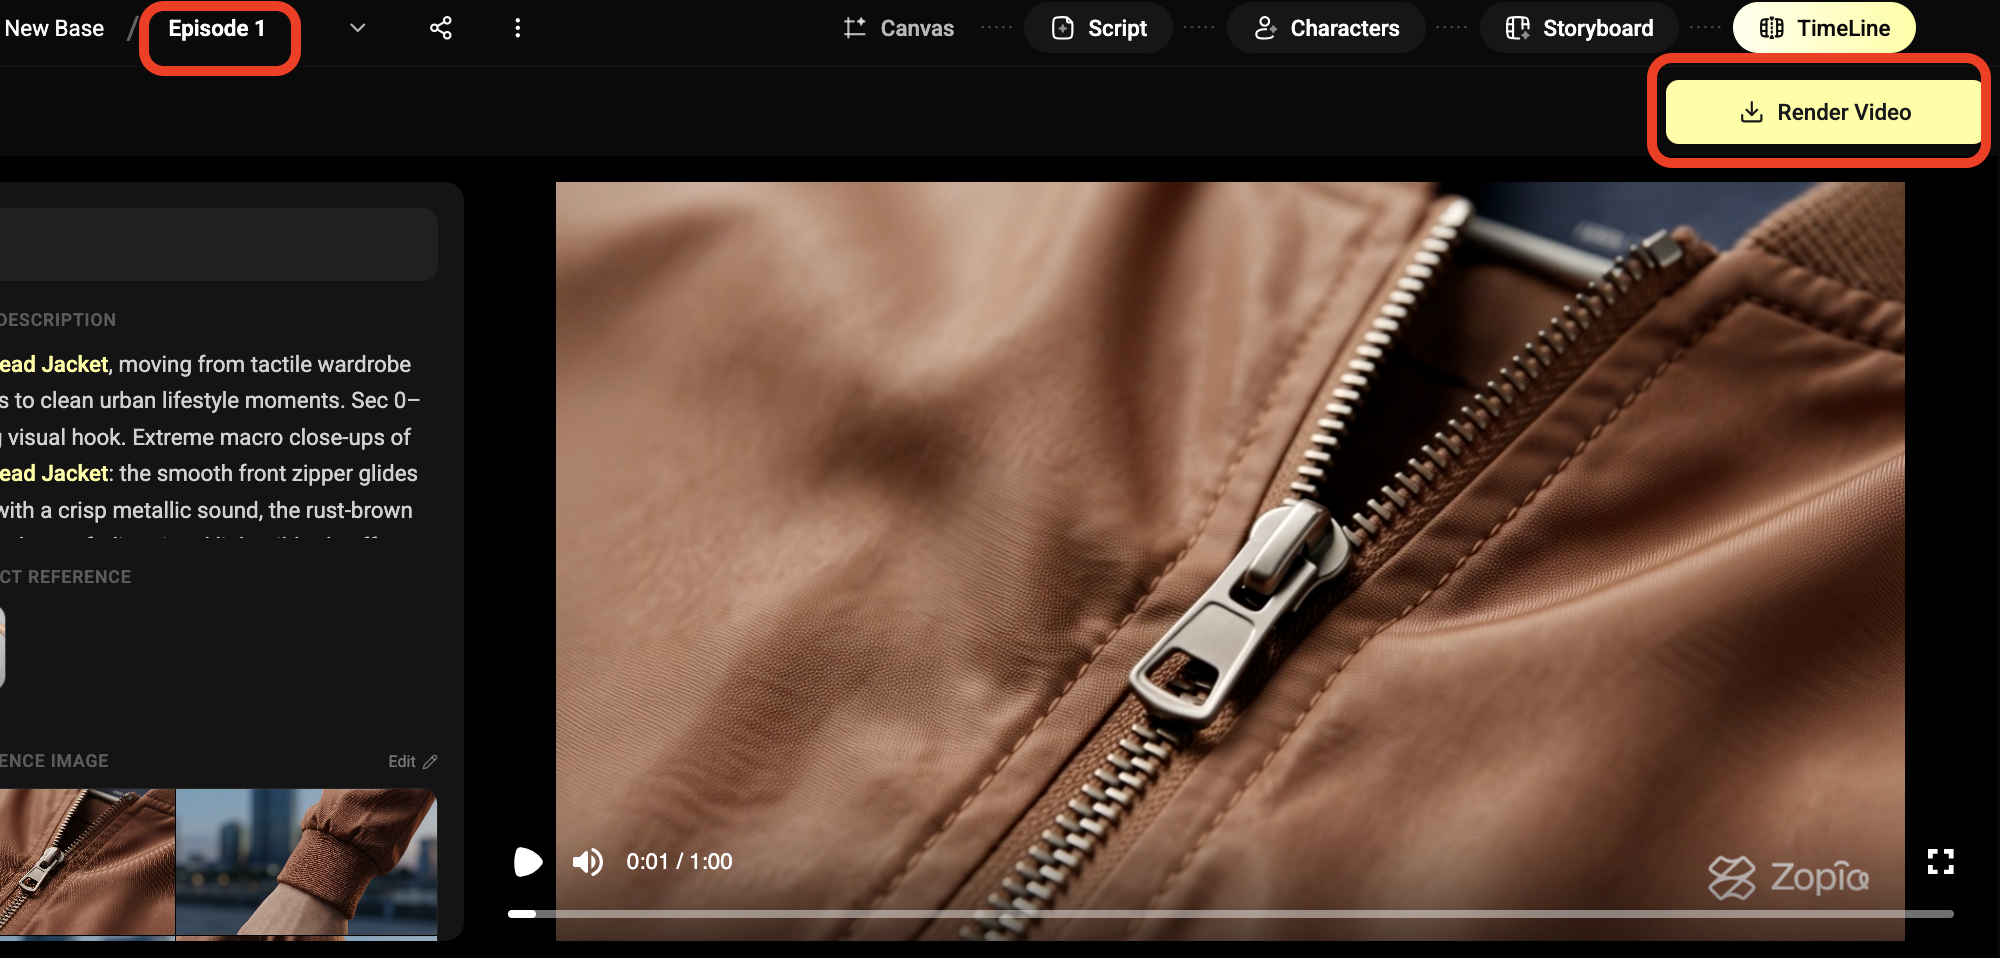
6.2 Timeline Editing
Rendered shots are automatically assembled in timeline order:
Shot order follows script logic
Transitions and duration are auto-matched
Basic trim and preview are built in
Goal at this stage is to get publish-ready, not heavy post-production.
Step 7. Multi-Episode Production and OpenClaw Automation
7.1 Multi-Episode Continuity
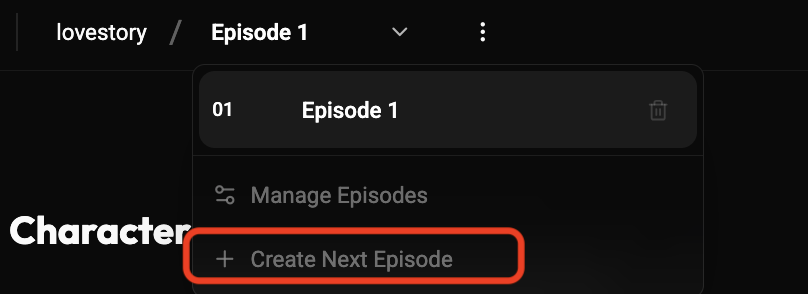
Click Create Next Episode to continue the series:
Existing characters/scenes are inherited
New characters are auto-detected and added
Assets remain managed within one project space
7.2 OpenClaw Integration for Automation
By connecting Zopia Skill to OpenClaw, you can:
Trigger creation remotely by chat
Run multi-episode generation asynchronously in parallel
Operate 24/7 with minimal manual intervention
This is especially useful for high-frequency publishing teams.
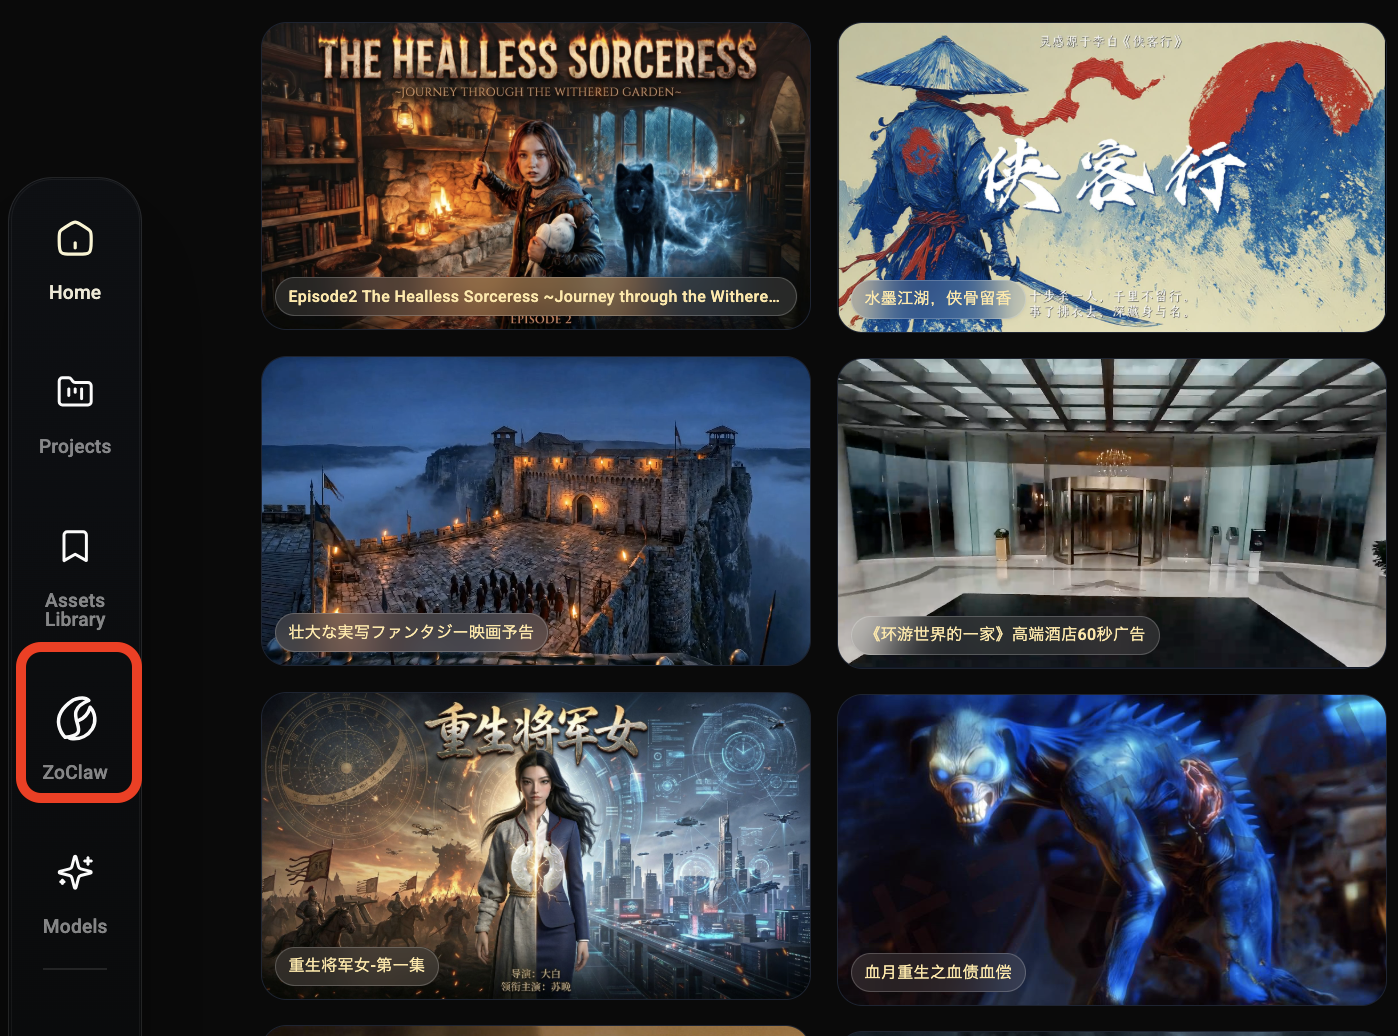
1. Enter the Zopia OpenClaw Interface
Once logged in, Click the OpenClaw icon on the left menu on homepage to enter the Zopia OpenClaw interface.
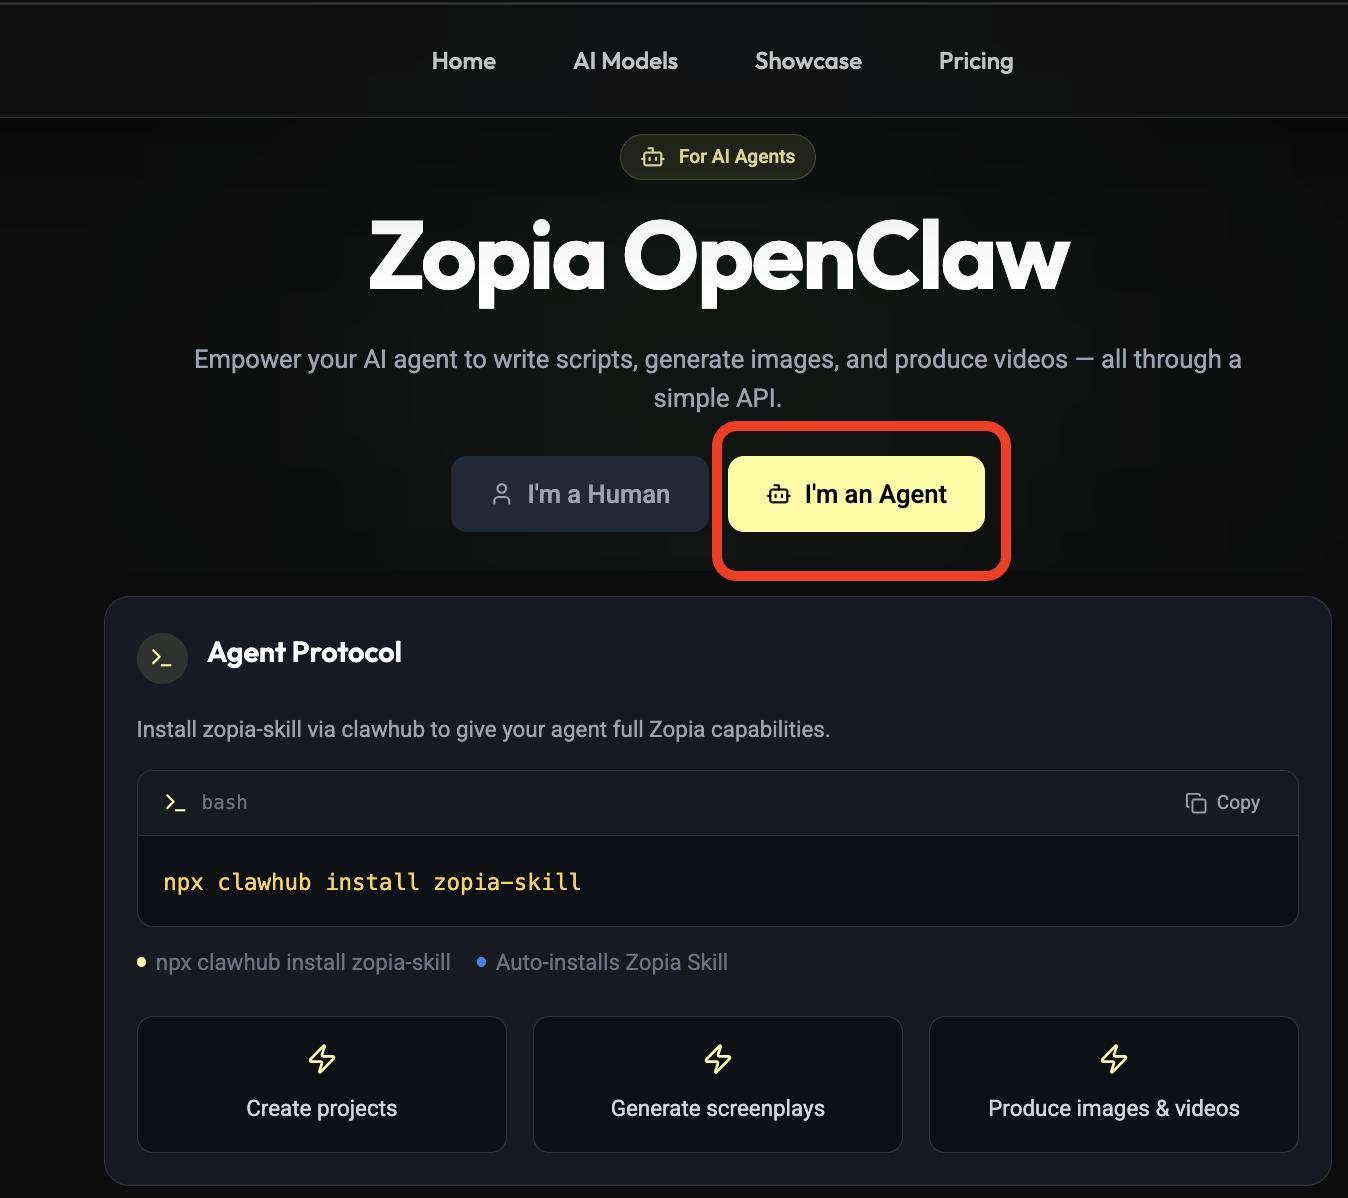
2: Copy the Prompt
Click “I’m an Agent” and copy the provided prompt.
3: Connect OpenClaw with Your App
Go back to the communication platform integrated with OpenClaw, and let OpenClaw autonomously install the required skills.
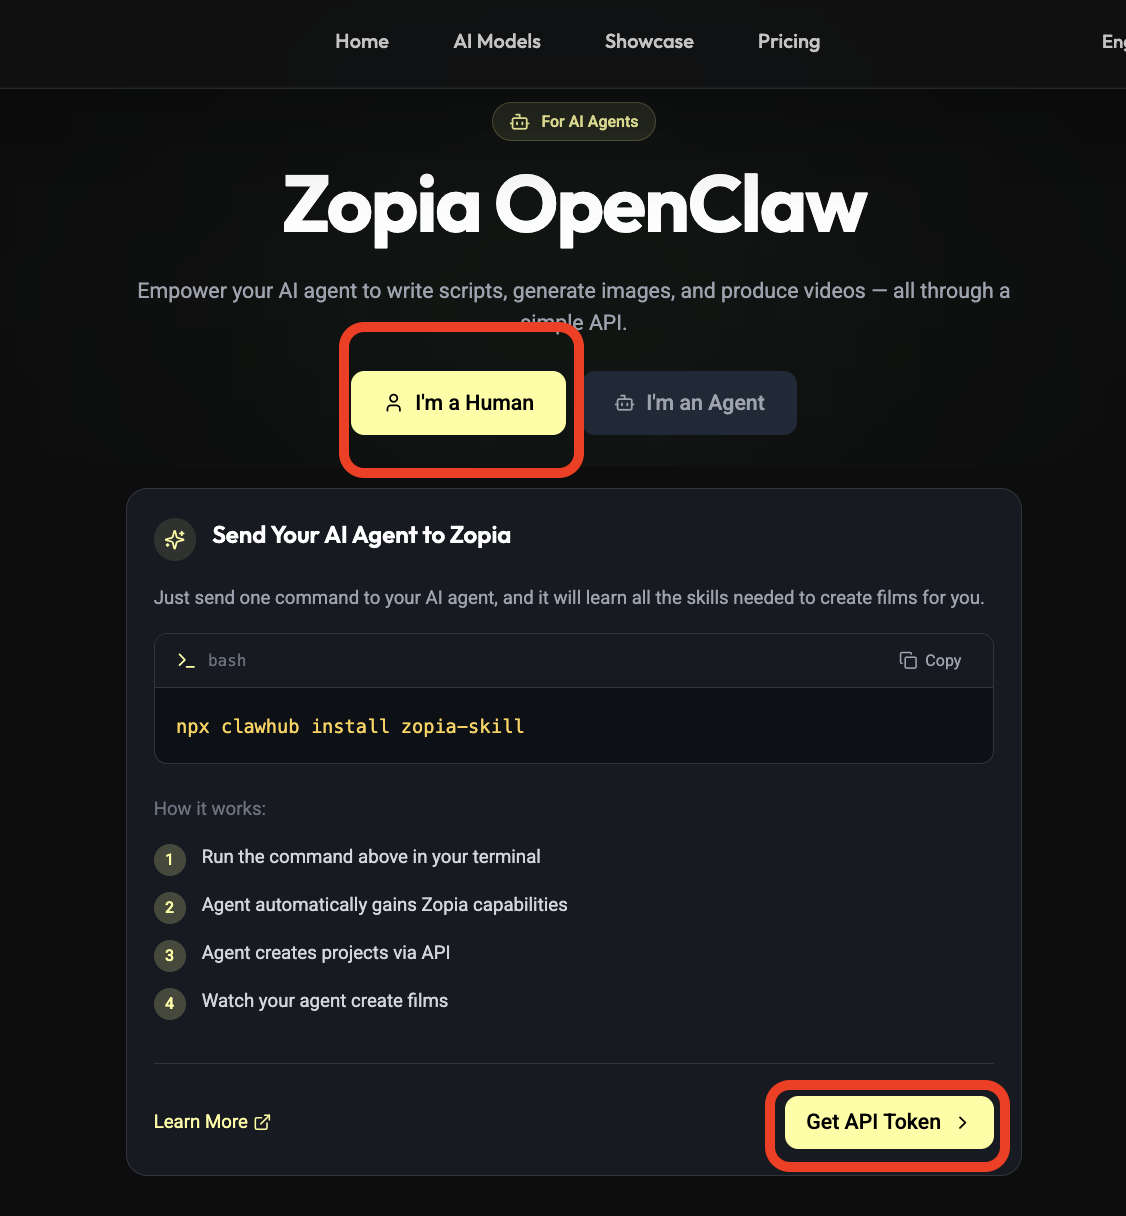
4: Retrieve Your Exclusive Zopia API Key
Return to the Zopia OpenClaw interface and click “I’m Human” to get your exclusive Zopia API key.
Then go back to the OpenClaw chat window in Feishu (or your connected app) and send the API key to OpenClaw.
That’s it! 🎉 From here on, you can command OpenClaw anytime, anywhere, your AI director is always ready to help.
Why This Matters Now
The biggest opportunity in AI-native video is no longer about “can you generate a clip?”,
It is “can you produce high-quality episodes repeatedly, with consistent narrative and style?”
That is where an end-to-end directing system changes the game.
Start Building NOW
Don’t let strong ideas get stuck in fragmented tooling.
Create your project at zopia.ai (https://zopia.ai) and start shipping publish-ready video faster.
If you run a studio or agency, ask about team collaboration and volume p